Shoving Platforms (aka SPLAT aka transfer caboose) are used when the locomotive is pushing the train from behind for longer distances than a 'short shove'. Conductors or switchmen will just hang onto the front car during 'short shoves'. Shoving platforms provide a safe place for the conductor and/or crew members to stand for longer distances.
The link is a picture of the 1:1 prototype from 1979 when it was a new caboose.
Some of the parts of this build were left stock because this had to function on an operational layout during a live contest/show.
Some of the images in this feature are larger than the default layout interface. Right click or expand images to view at full size.
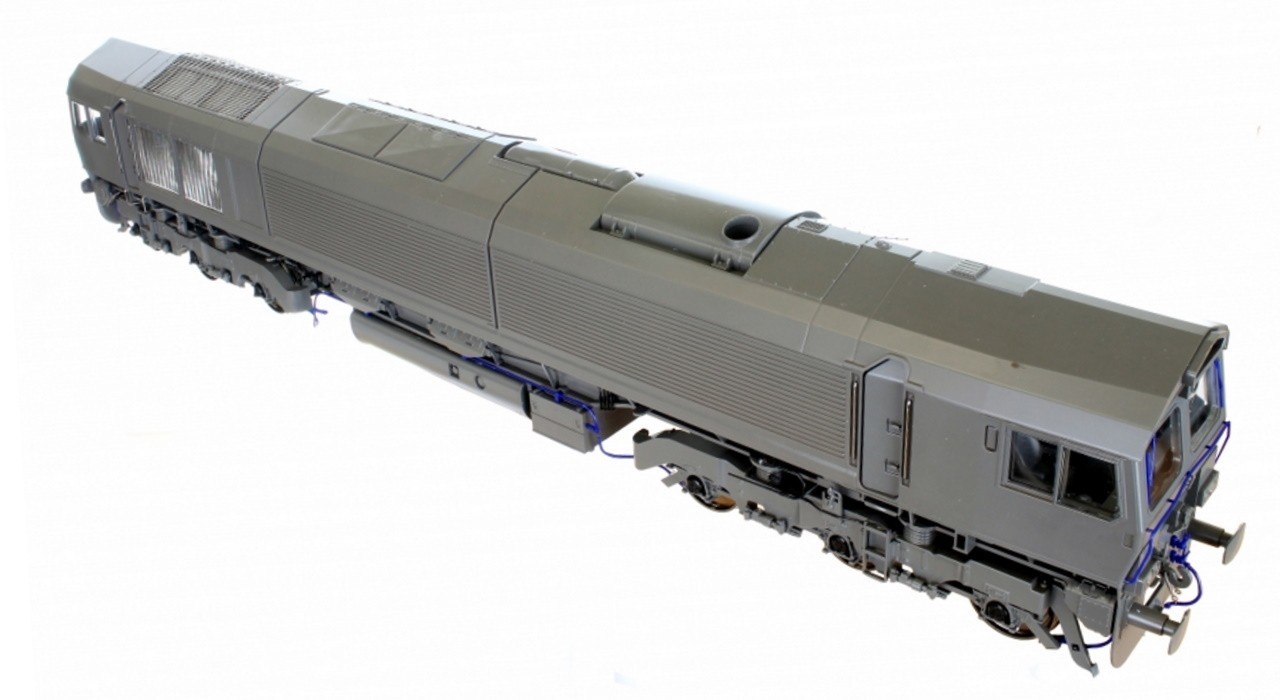
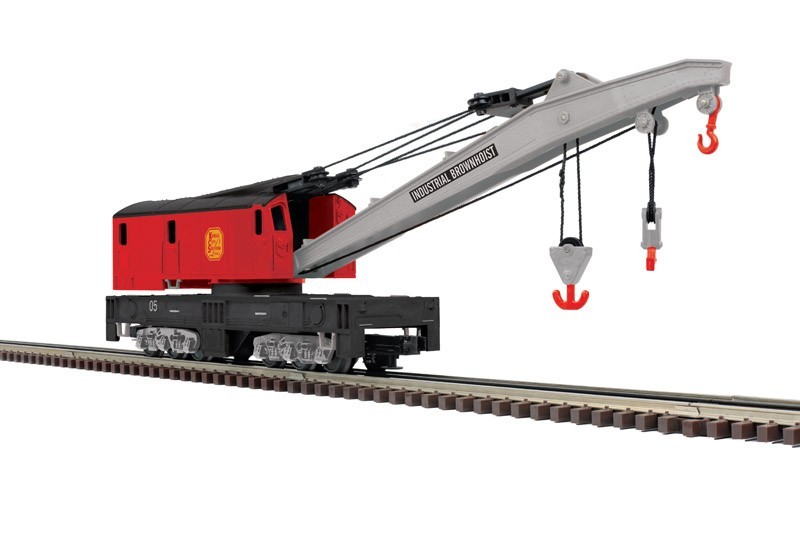
This is the stock kit from M.T.H. Electric Trains that I convert into UP25831 shoving platform.
.
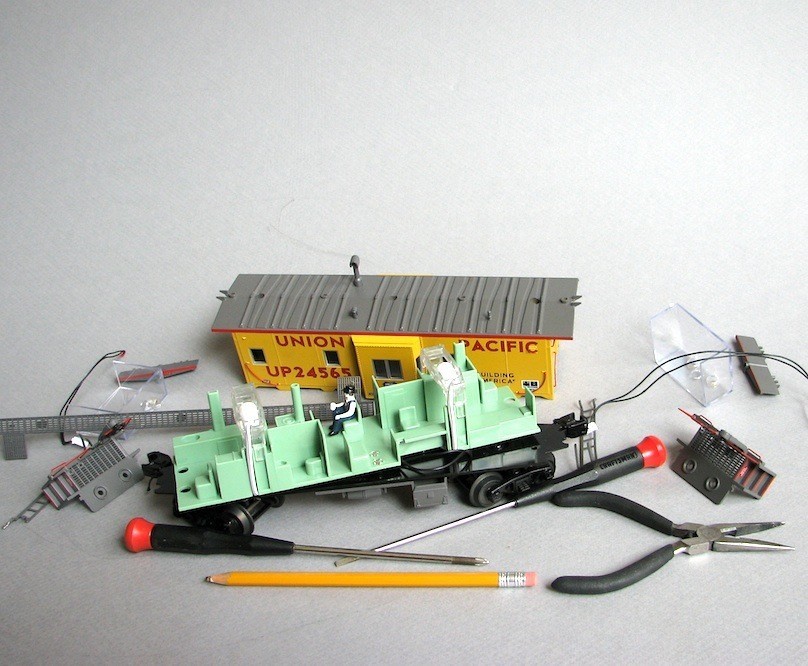
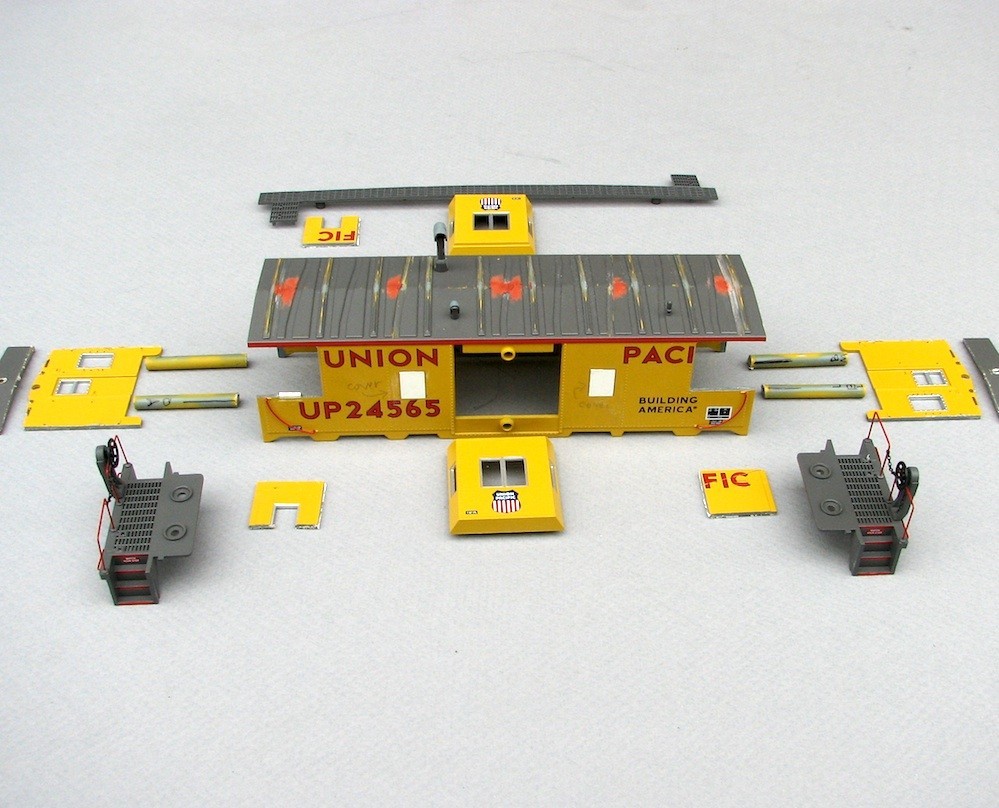
Completely disassembled to remove unnecessary parts and to begin cutting and chopping.
.
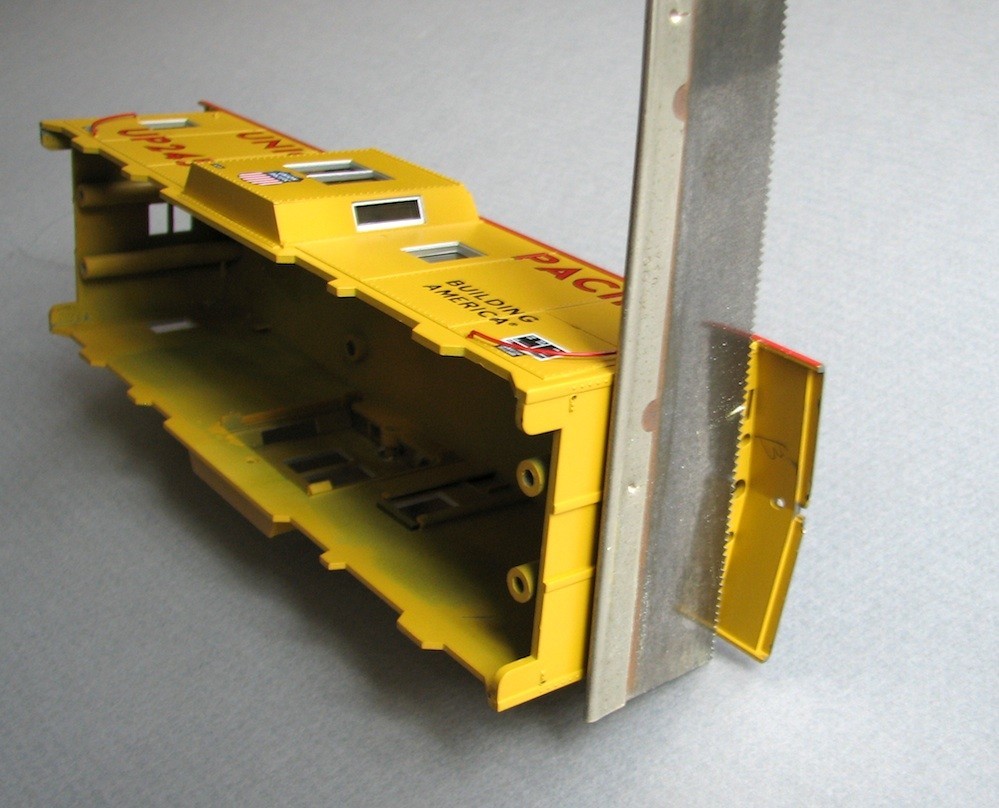
After removing the roof-walk part from the roof, the roof ends were cut back to prototypical dimensions.
.

The holes in the roof that were left behind after removing the roof-walk part were putty filled.
Junk-mail credit card material were cut to fill the trapezoid cavities at the bottom of the skirts on both sides.
.
The (4) assembly bosses were carefully cut flush to relocate inboard later.
.
Main body cuts and chops are done with some windows filled in with styrene sheet.
.
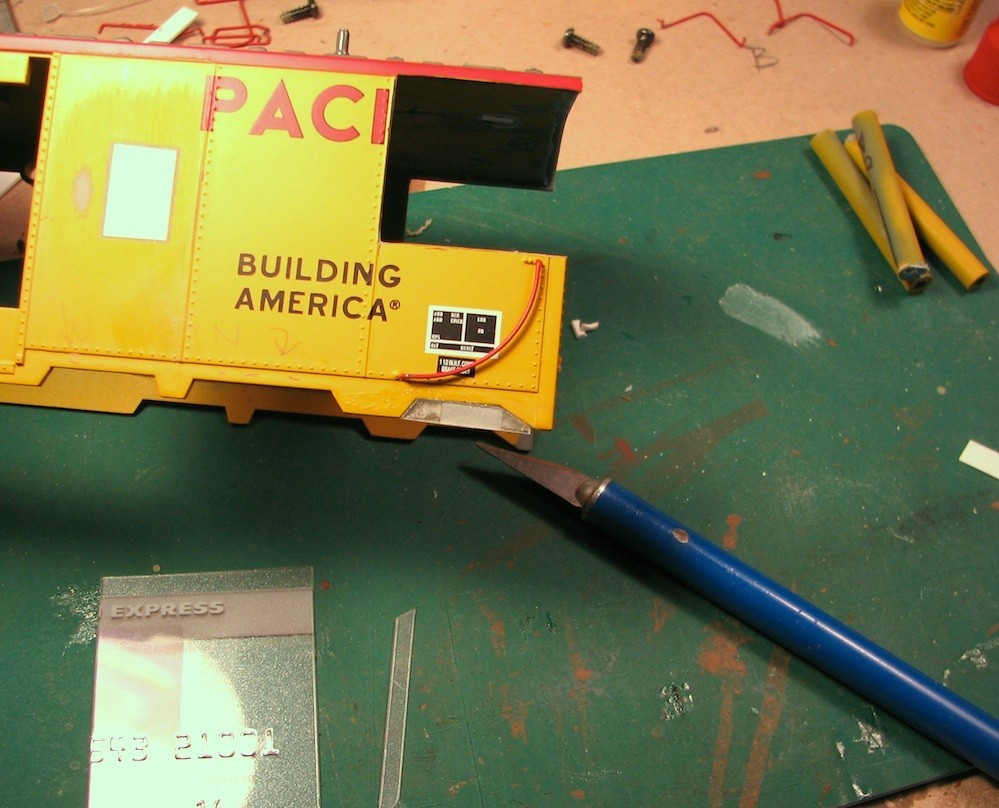
The Isosceles Trapezoid openings along the bottom of the skirts of both sides are filled with, junk-mail-credit-card-offer material.
.
A new window is cut into position.
.
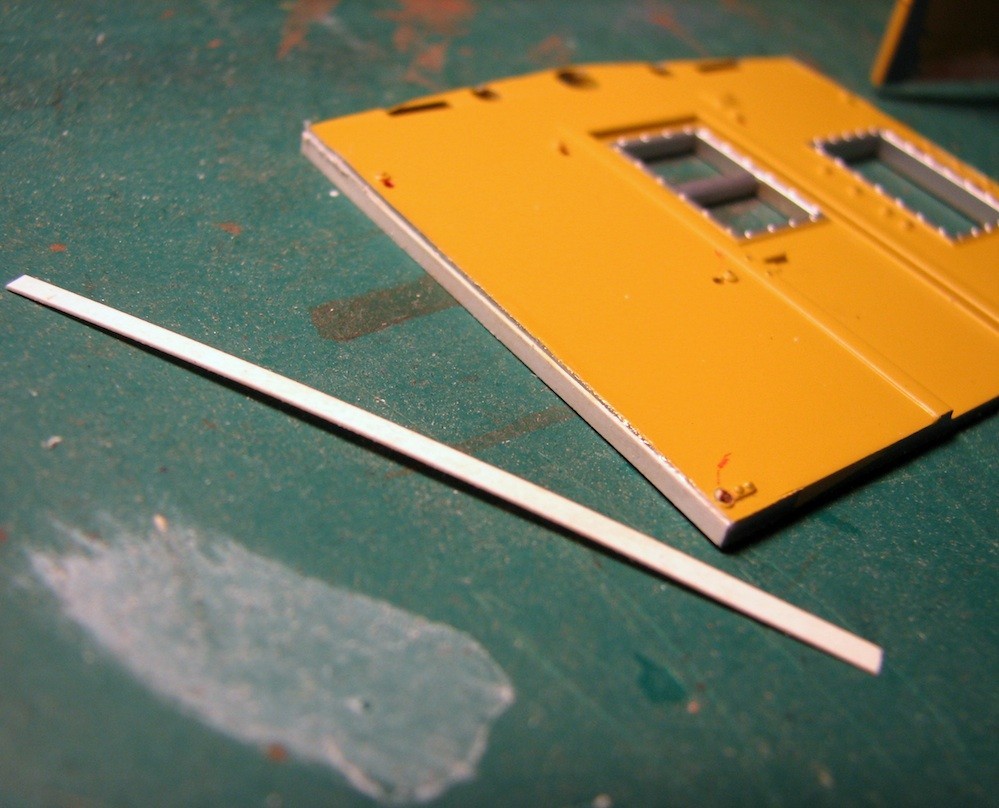
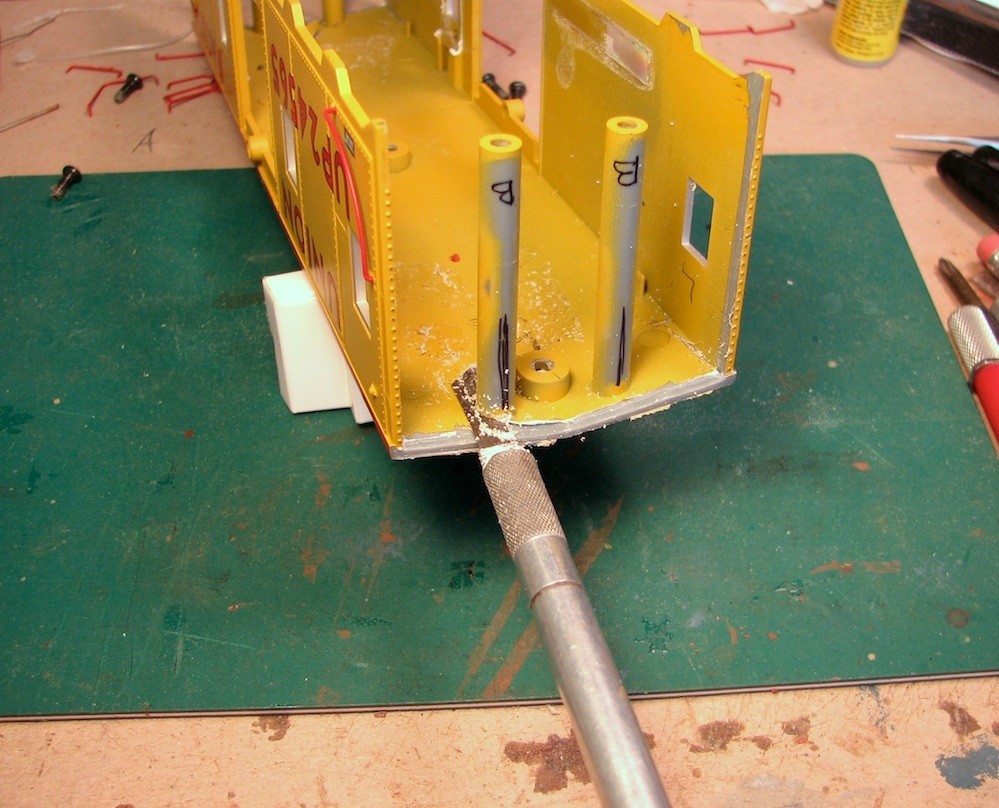
The kerf of the blade that I used to cut out these end wall pieces are shimmed with styrene at just the right thickness. These end wall parts will be glued back into place further inboard, prototypically.
.
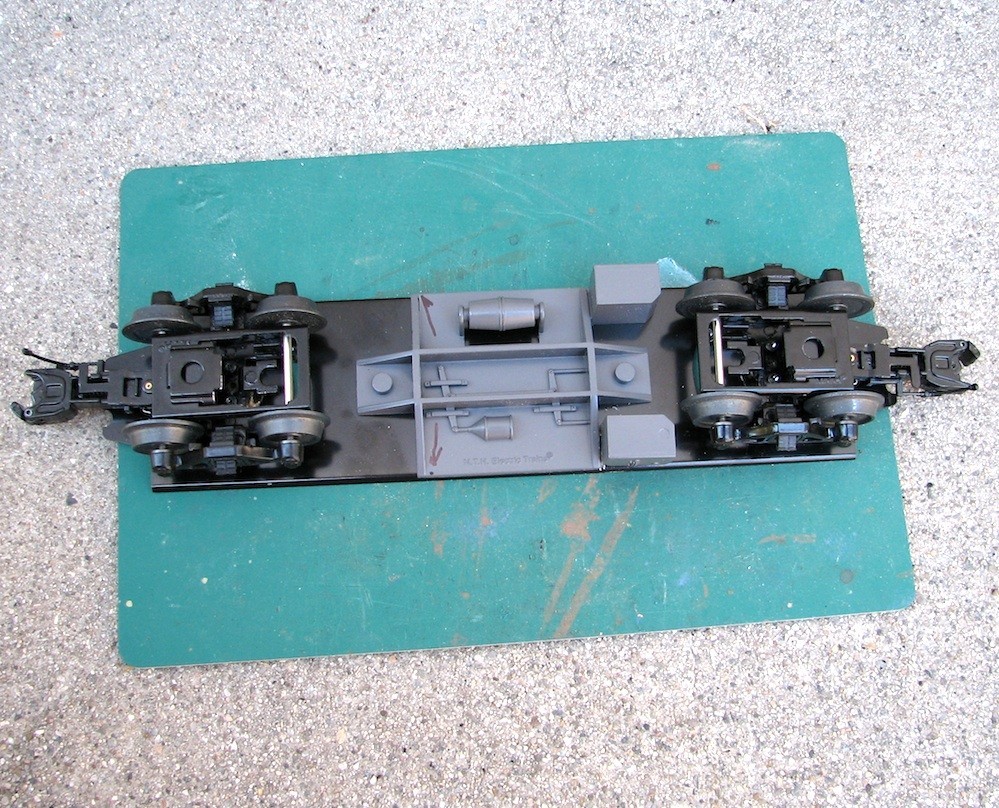
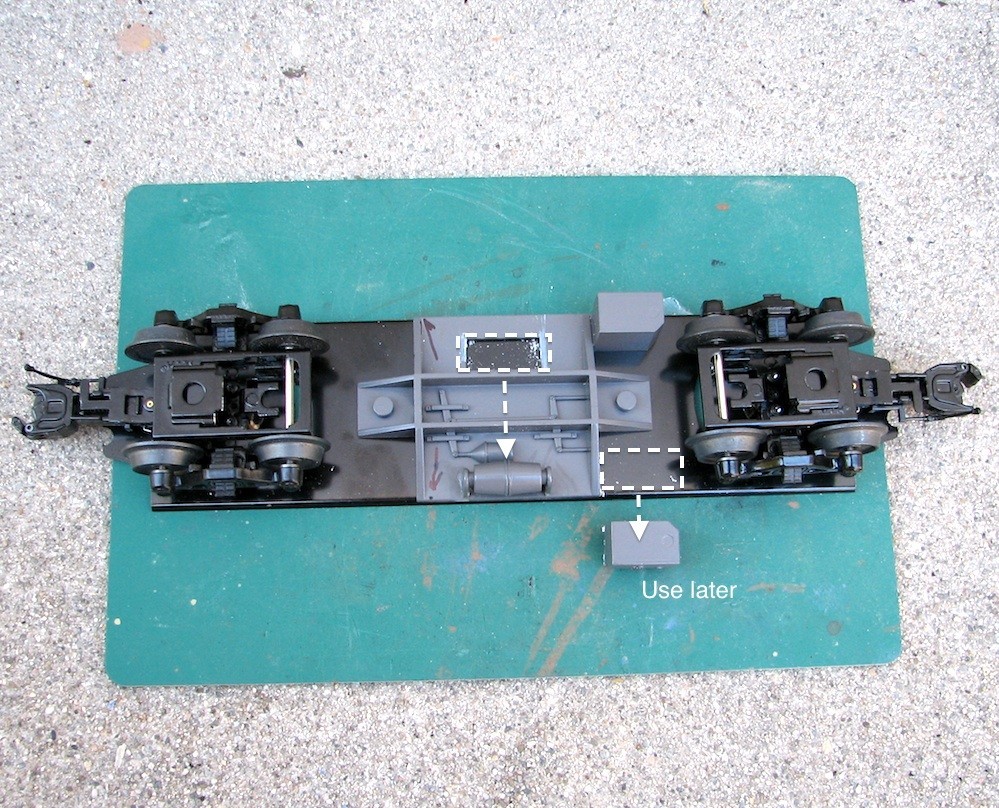
Detail underneath were relocated and/or removed to match the prototype.
.

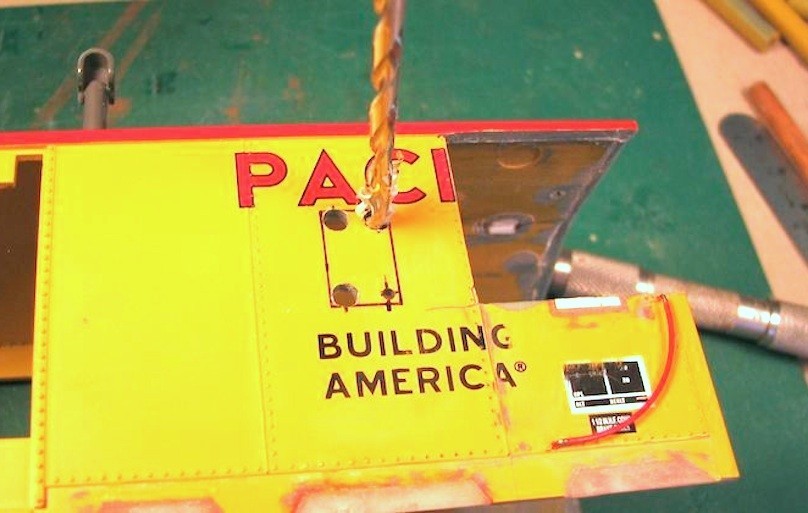
The end walls were moved inboard so the 'assembly bosses' also need to be relocated. The new holes will be drilled where I can use a screwdriver while the trucks are installed. These locations were found, measured and marked . . .
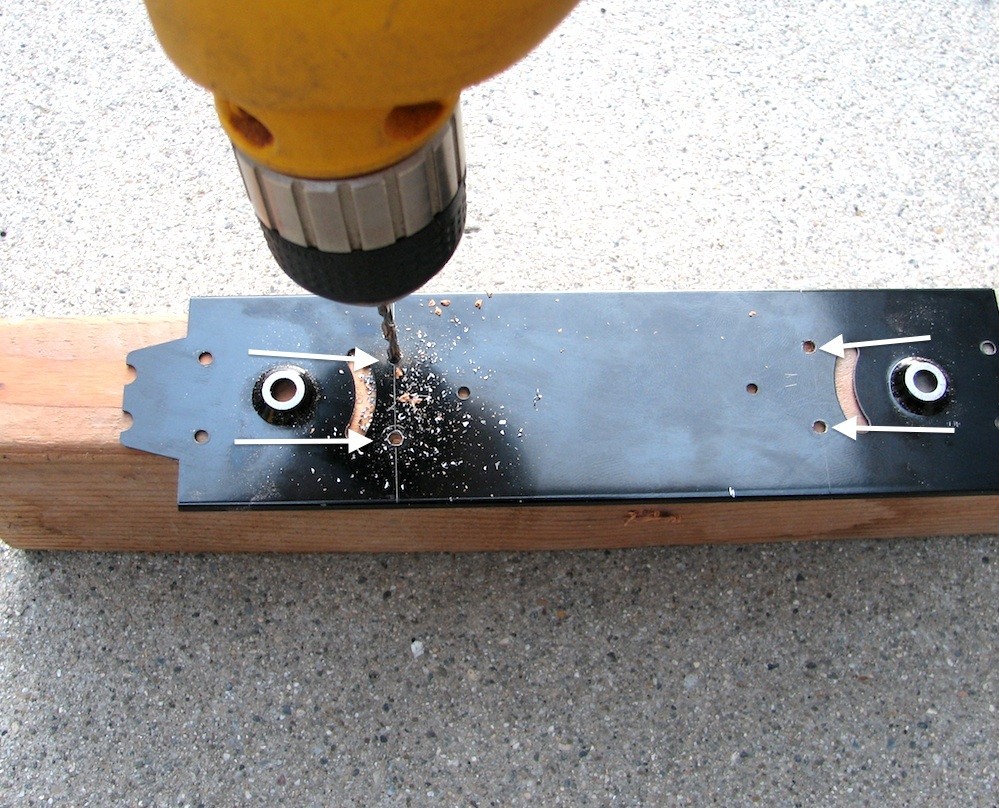
. . . Then drilled with a 1/8" bit.
The spacers are required for this to work. The spacers are from the end walk parts.
The bosses were then screwed into place following the positions that I marked earlier before removing. A ball of epoxy putty was stuck to all four tops of these. Then the cab body was squished into final position over these.
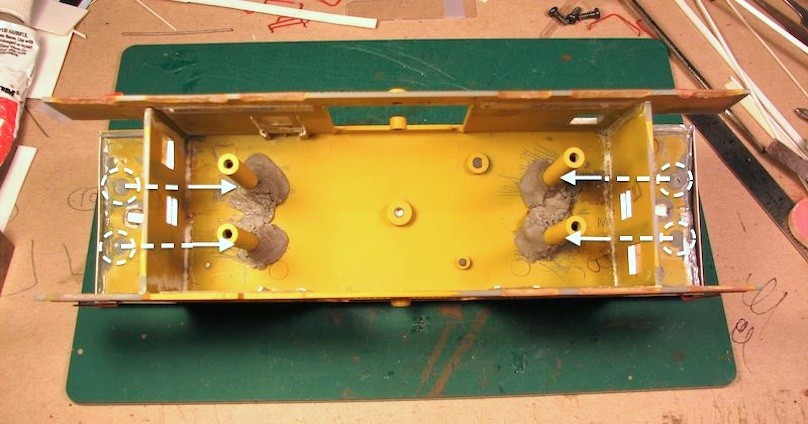
Epoxy putty secures the new locations. I added more once the first batch cured.
.
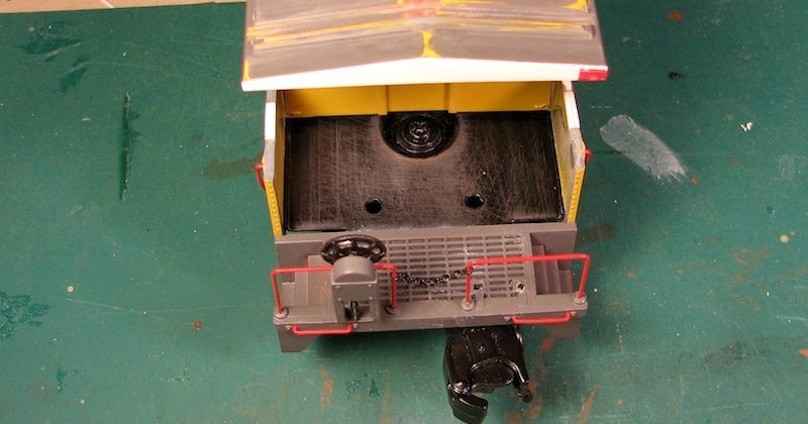
Now that the end walls and bosses were all relocated inboard, the floor of the frame is exposed revealing the old screw holes and screw for the trucks.
.
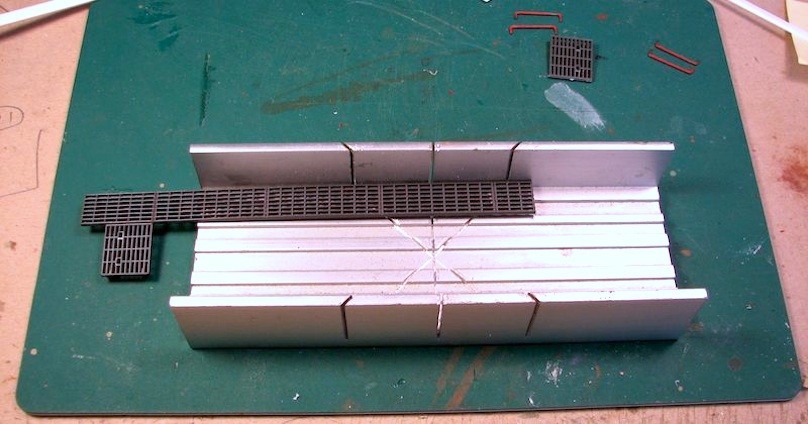
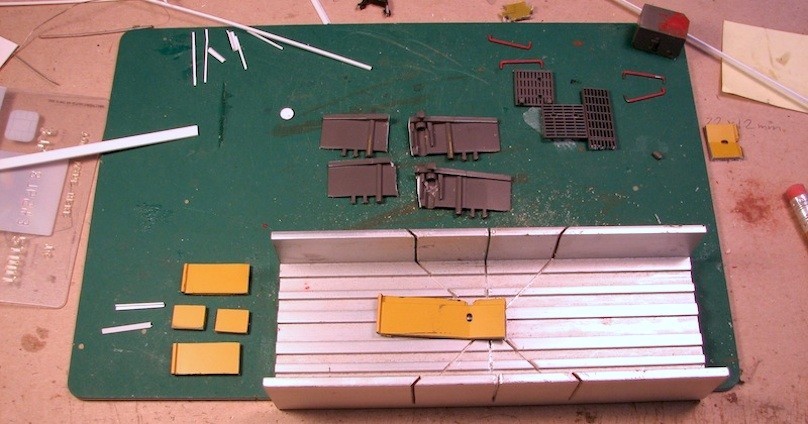
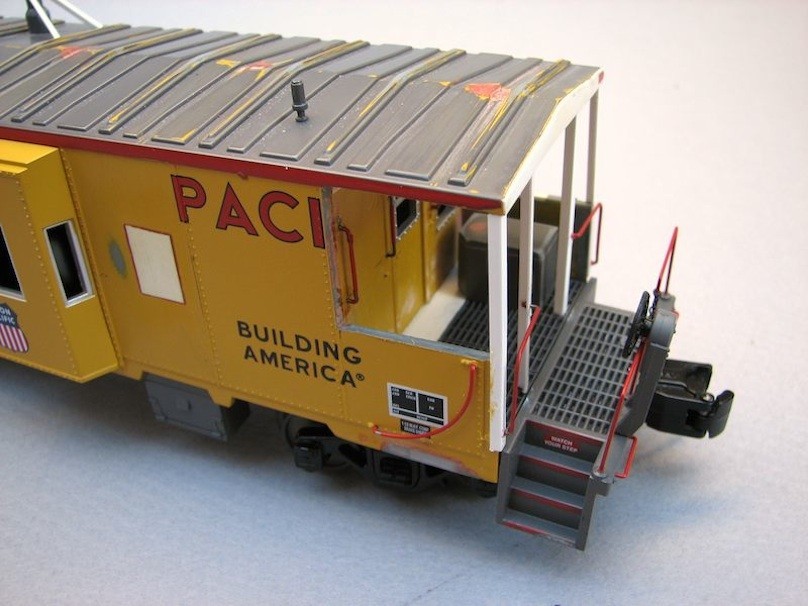
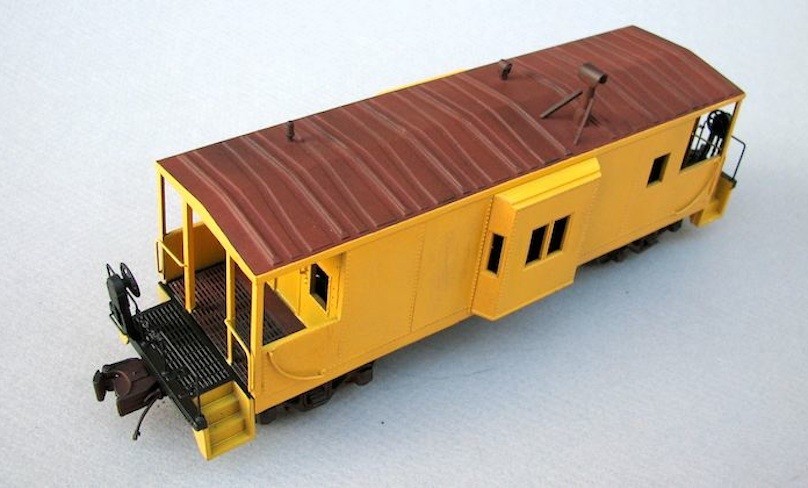
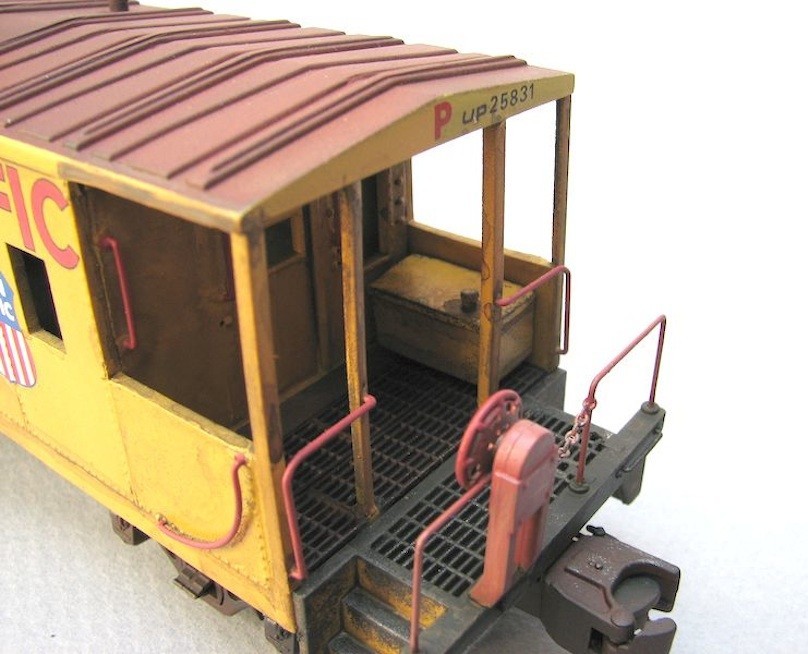
The prototype has a grip grating floor so I similarly replicated this by using the roof-walk part that I removed earlier.
.
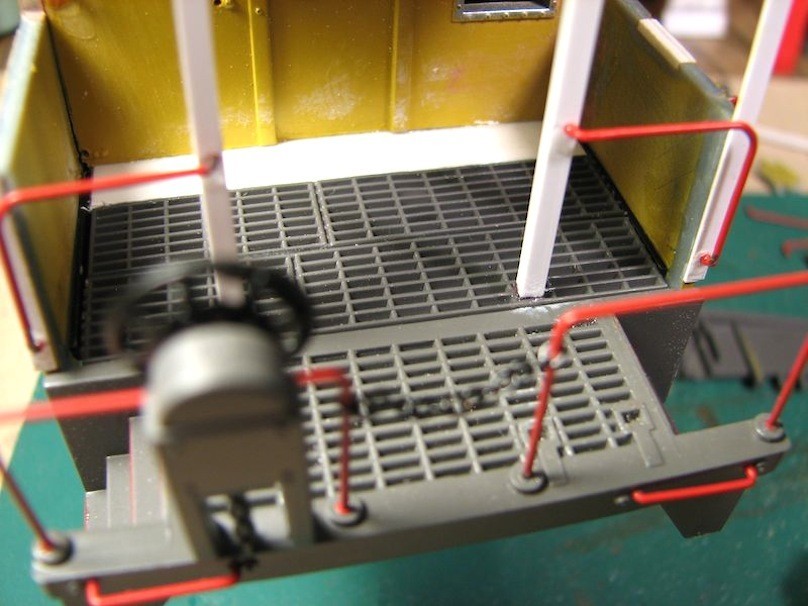
This works. It is the exact thickness as the two end walkway parts so the fit was perfect.
I've already started work on the uprights using styrene angle strips. The rails that were removed from the stock kit, earlier were also reinstalled.
.
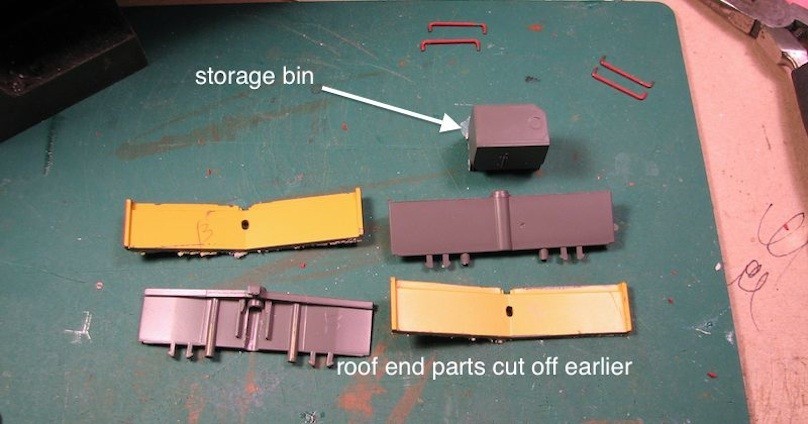
There are objects on each end of the platform. One looks like a storage bin and the other looks like a fuel tank. I'll make these from material cut from the kit.
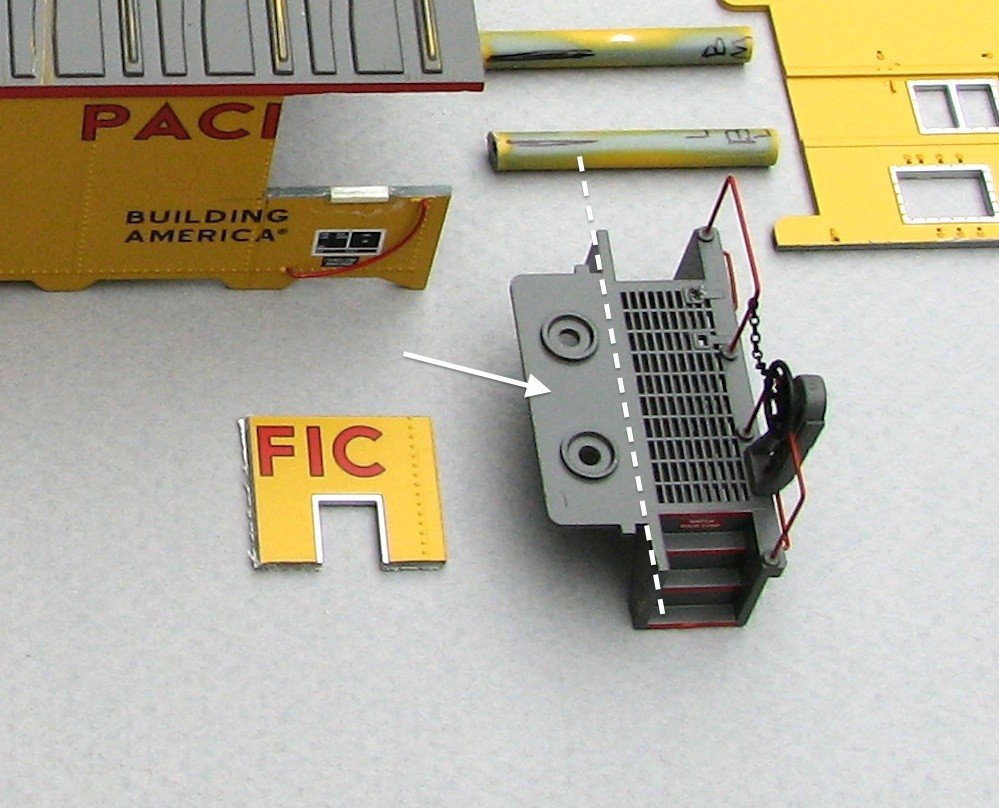
The storage bin (fire fighting equipment bin?) I cut from the bottom piece earlier.
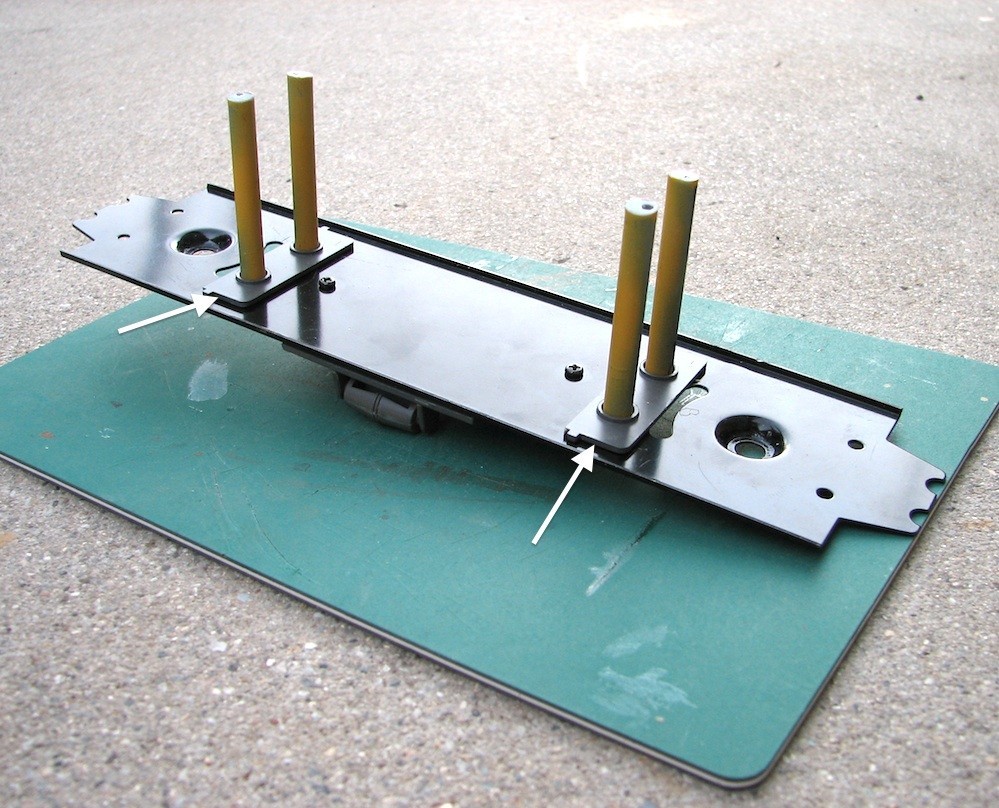
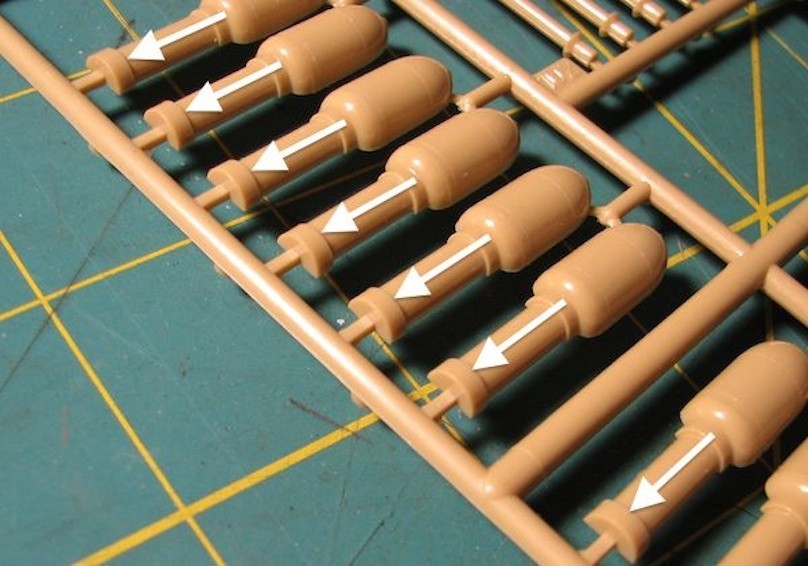
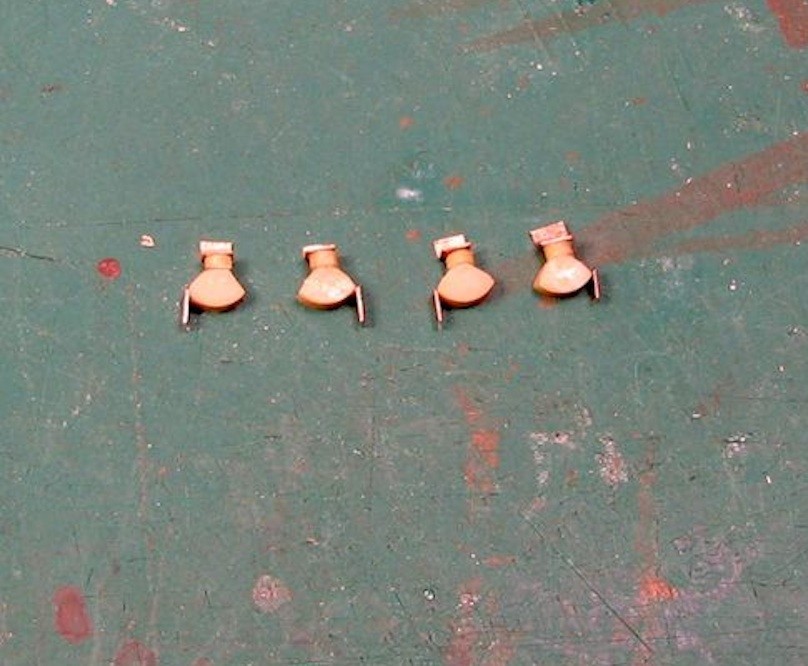
Fuel tank parts being fabricated from the roof parts cut off earlier.
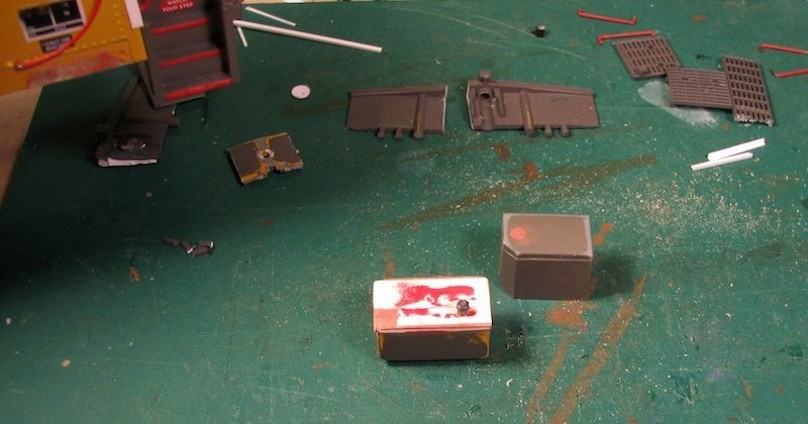
Completed parts ready for primer.
.
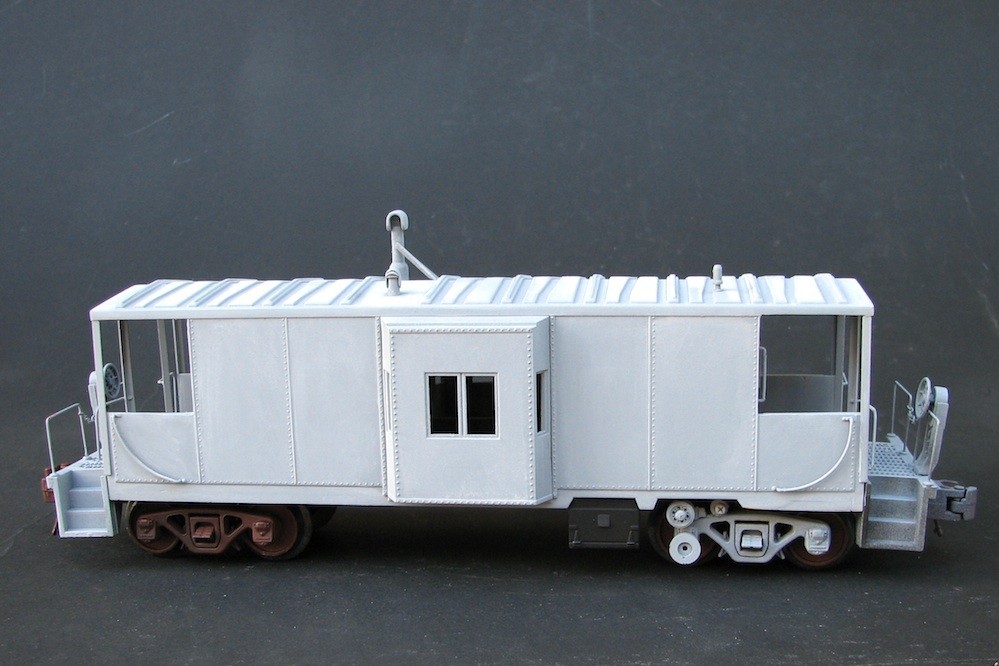
The model is about ready for primer.
.
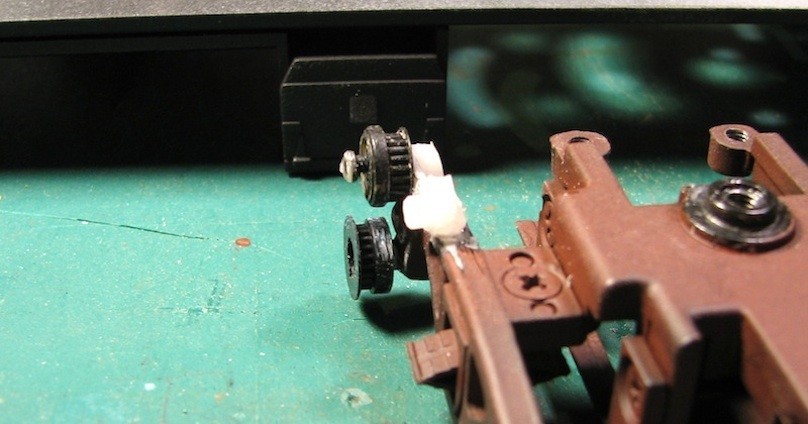
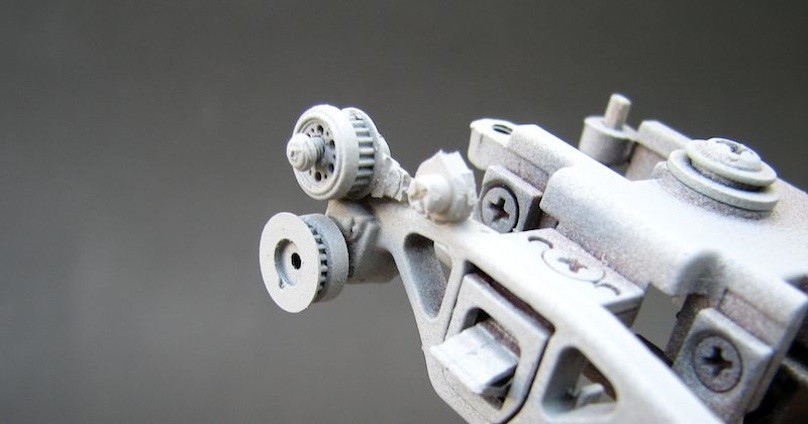
The generator pulley wheels were made from scrap parts from a disposable lighter, an audio cassette, and a 1/72 StuG III road wheel.
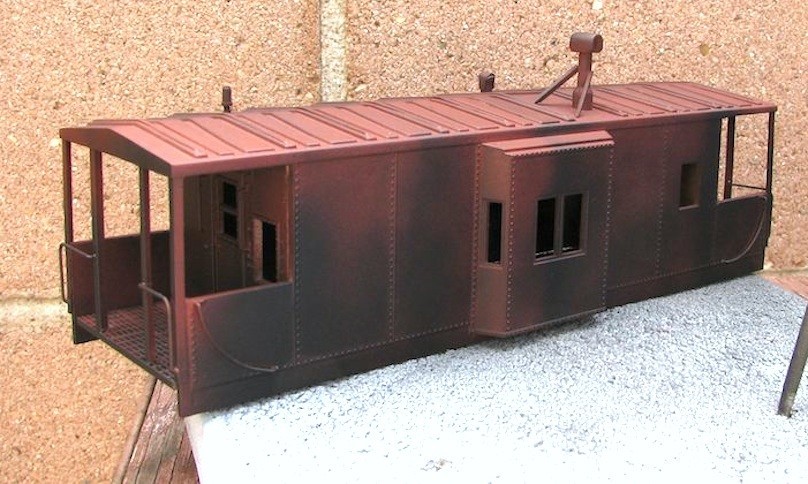
Roof color and preshade base coat is Rust-Oleum red primer and flat black straight from the aerosol cans.
.
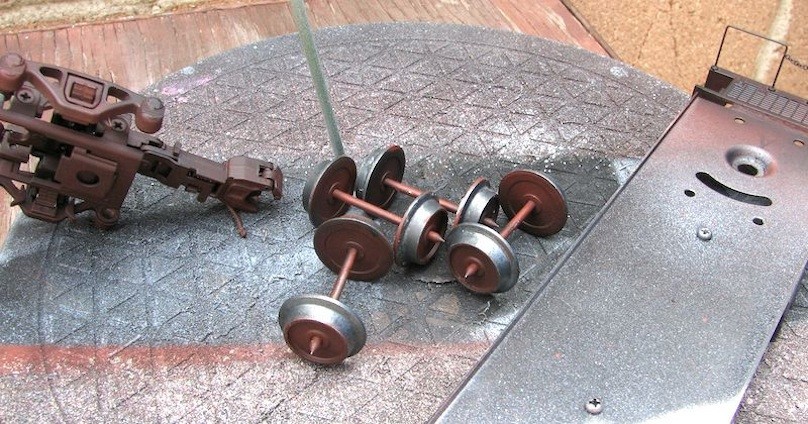
The wheels were masked with tape then sprayed with Rust-Oleum red primer.
.
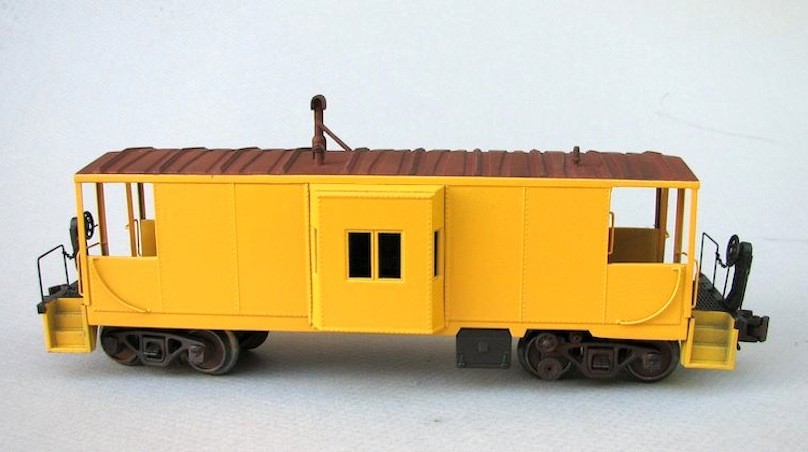
After masking the roof I sprayed aerosol can Krylon Sunshine Yellow which is a perfect match for scaled UP yellow. The end walks areas were sprayed flat black for a base color to weather.
.
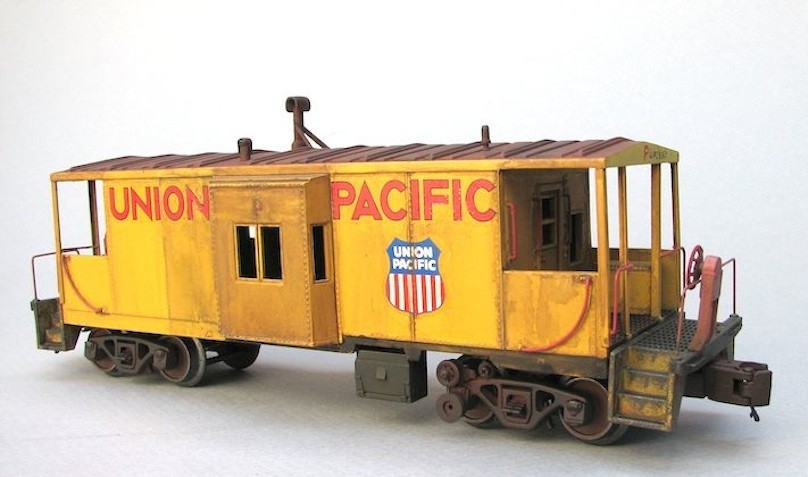
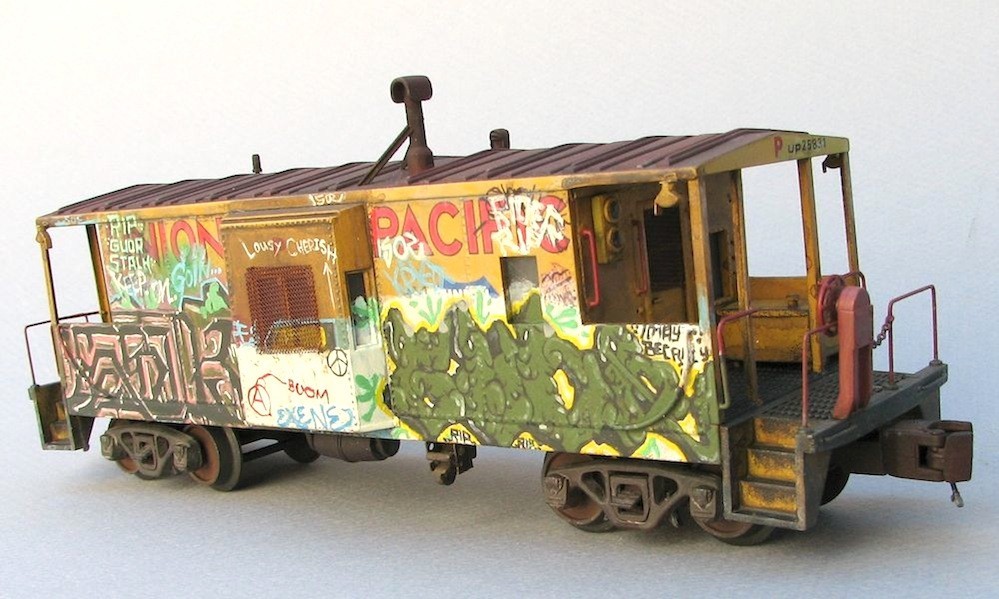
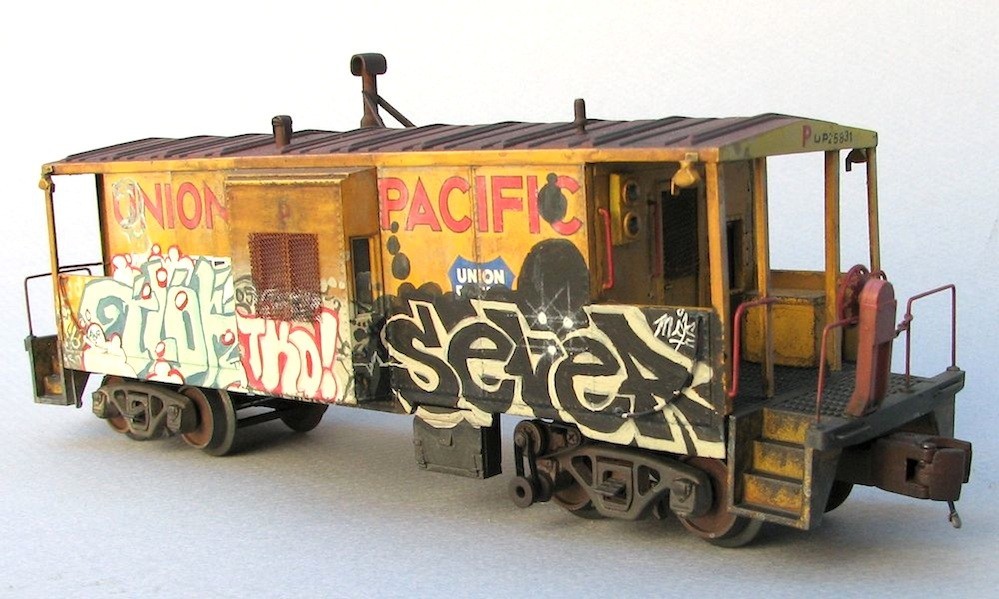
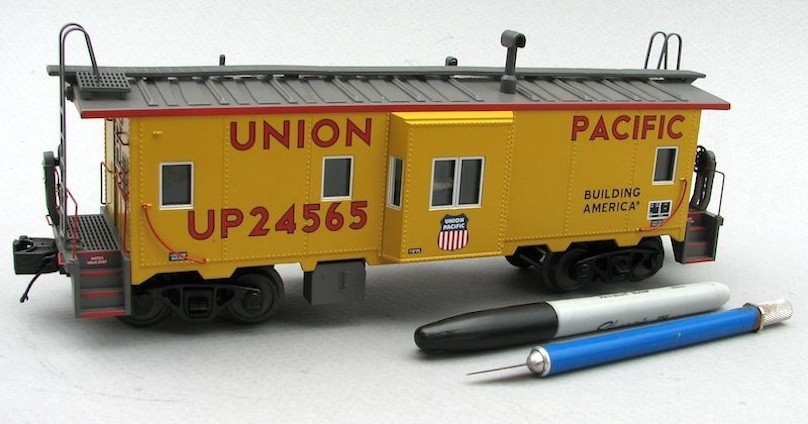
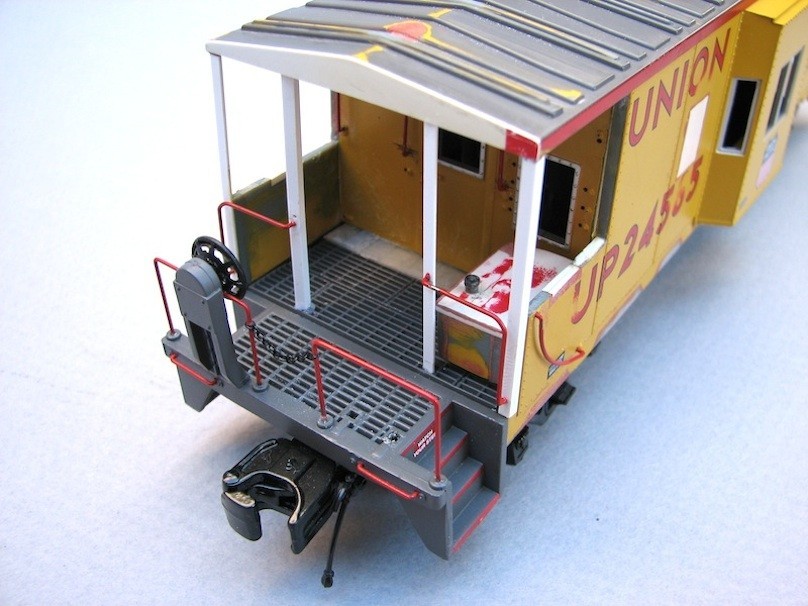
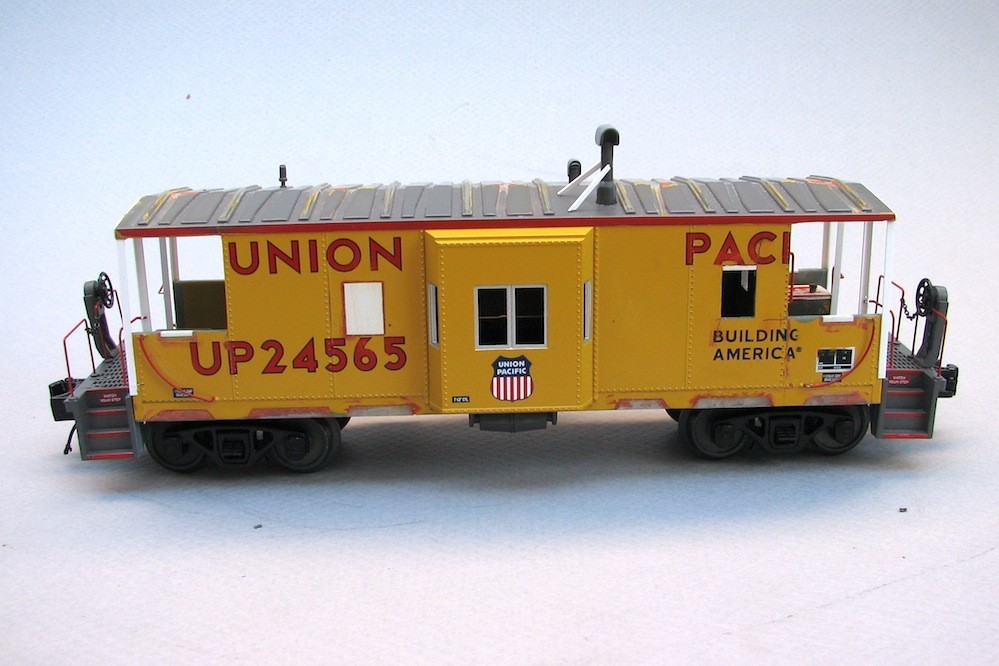
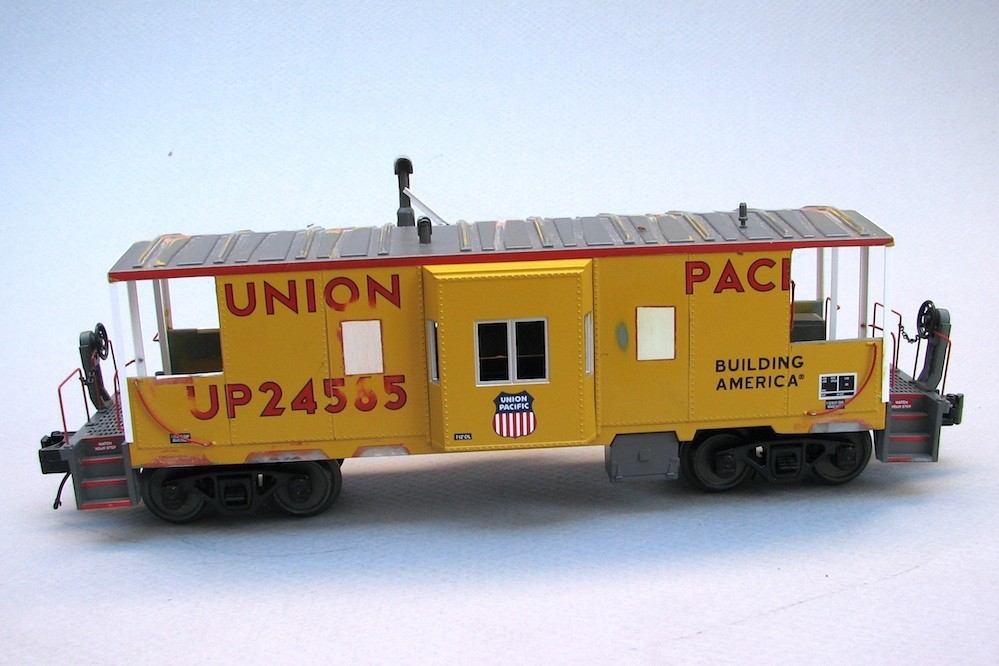
Decals and some weathering done.
.

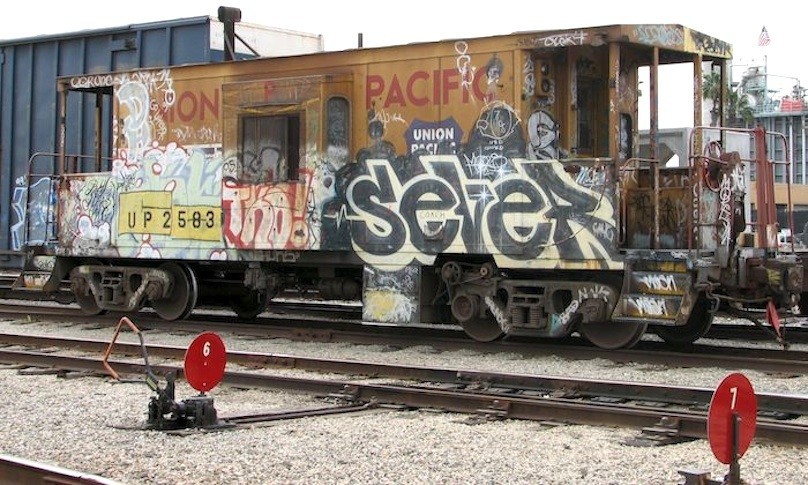
This is the same UP25831 in 2010 which is now a shoving platform. Now I need to replicate the graffiti.
.
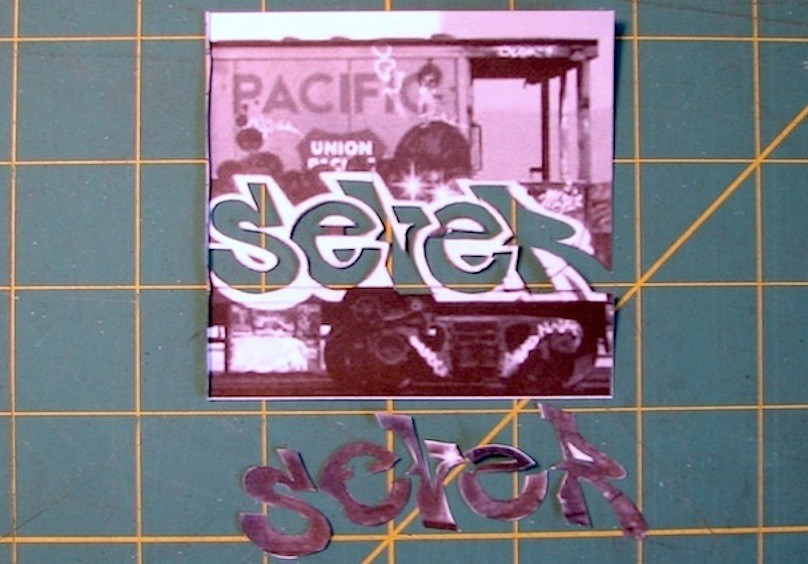
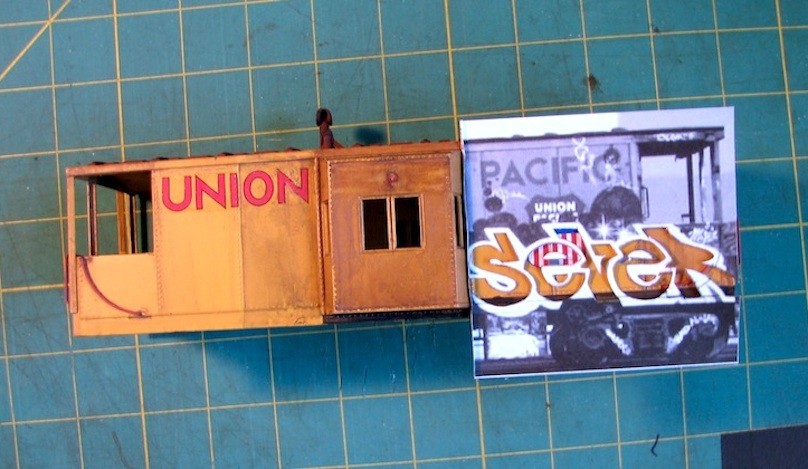
I printed images to exact scale from straight-on shots of the graffiti of 2007 - 2008 that I want to replicate.
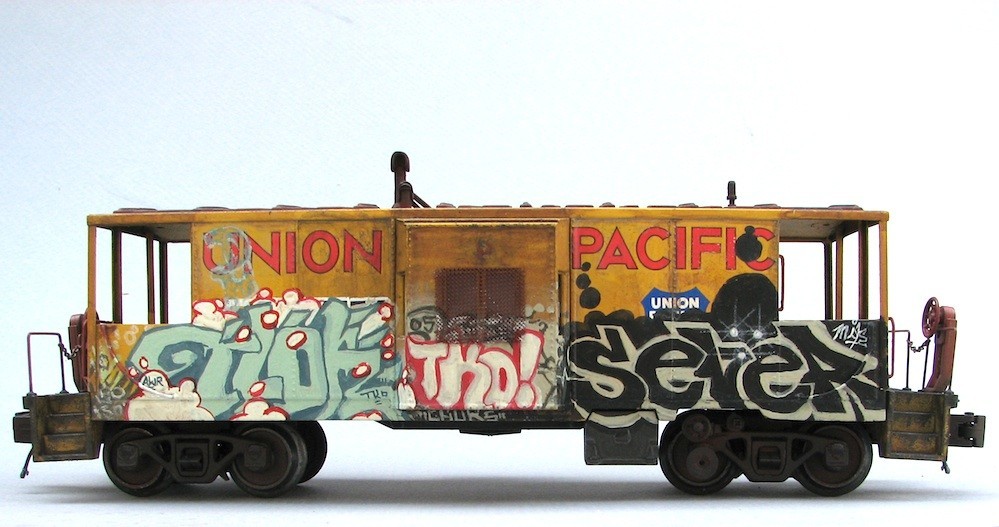
These prints were cut out as stencils to get the proportions and styles just right. These stencils were held in place with my thumb while I painted in the 'fills' with hobby brand acrylics. The 'outlines', 'clouds', 'shadows' and details and touch-ups will be handled later freehand with a fine brush.
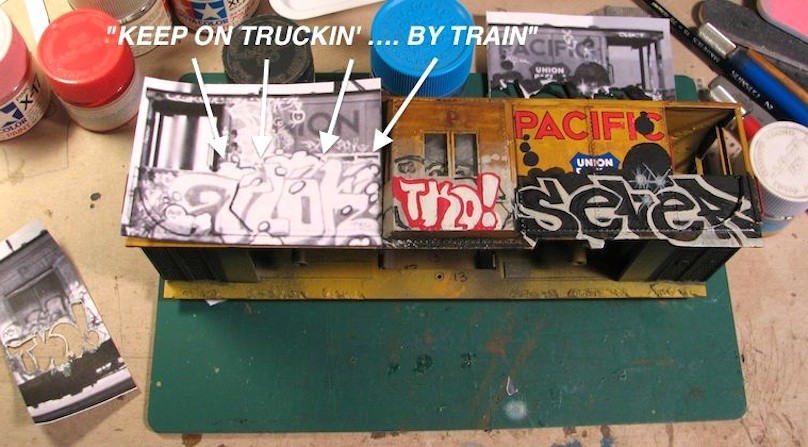
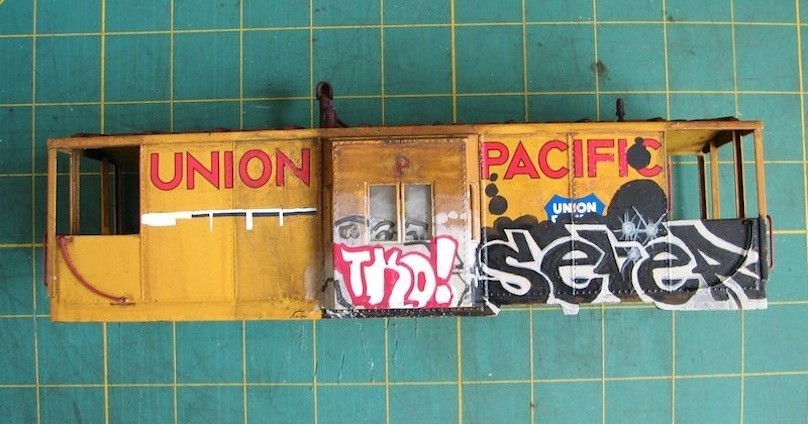
The factory deco of "KEEP ON TRUCKIN' . . . BY TRAIN" is barely visible behind the top of the graffiti on the left in this image. This is replicated with scrap decals.
.
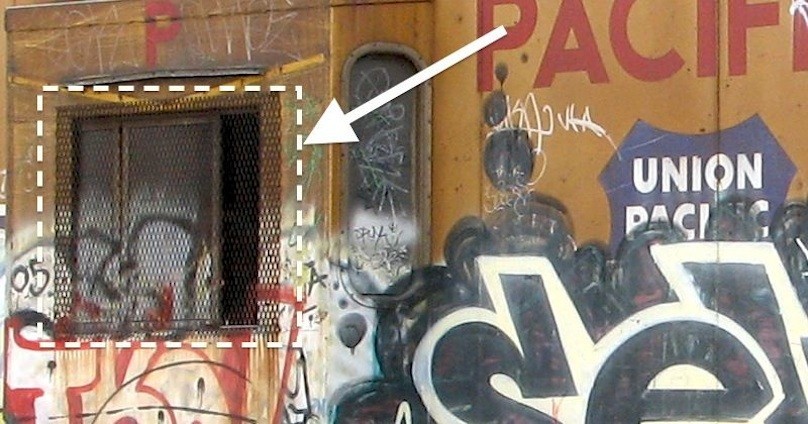
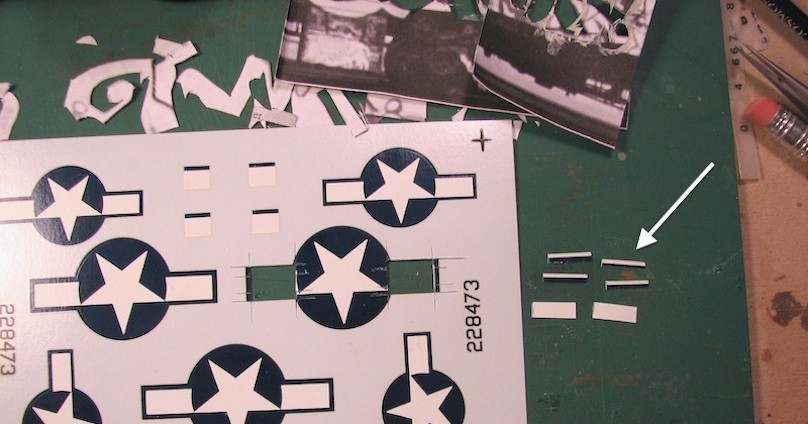
There are screens welded over the large side windows and end door windows. I found fine screen from a 12" diameter frying thing used for … frying food on the stove, to replicate this.
I measured and cut the parts then spray painted ruddy red primer.

The reporting marks, consolidated stencil, and plate markings are all covered by graffiti on the prototype.
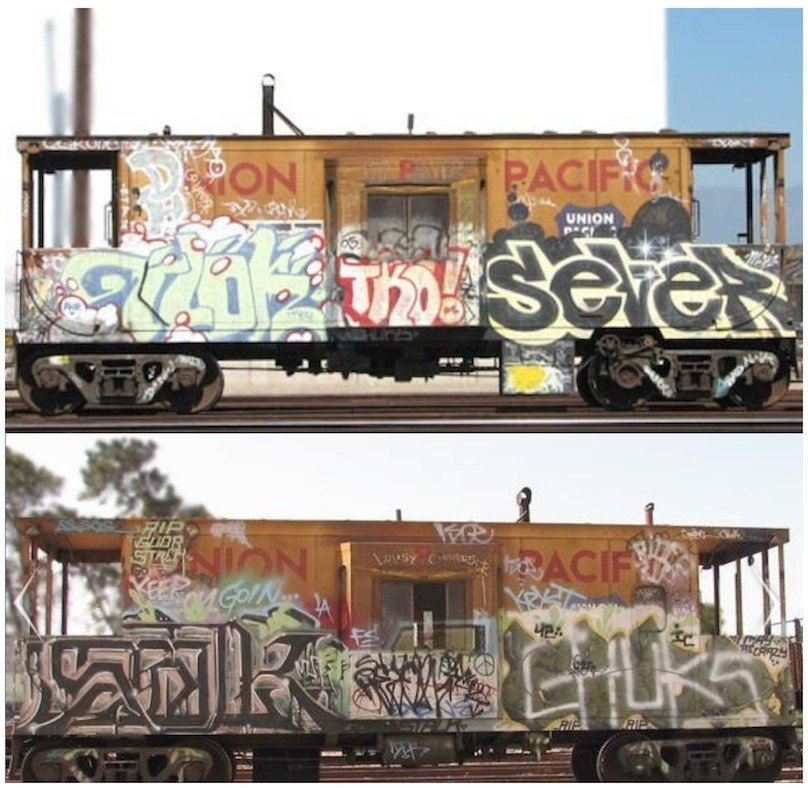
1:1 prototype images.
.
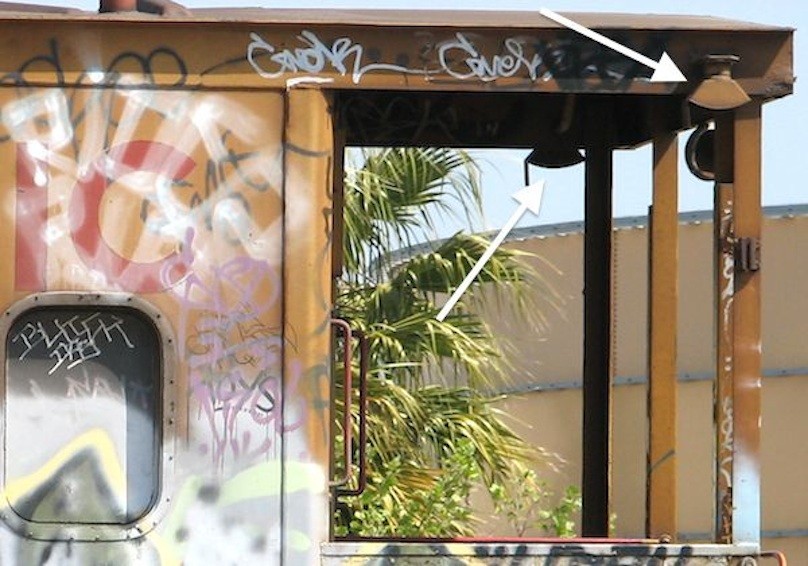
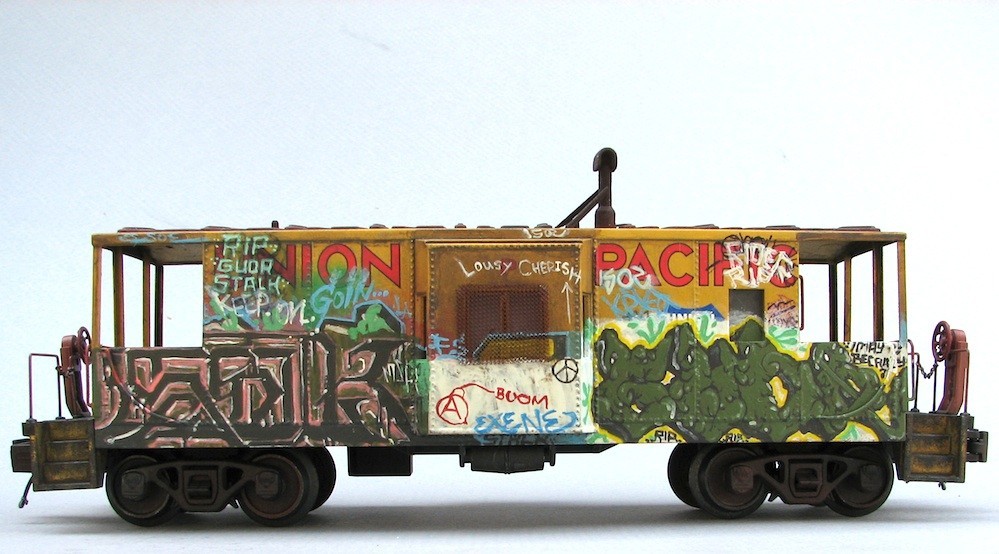
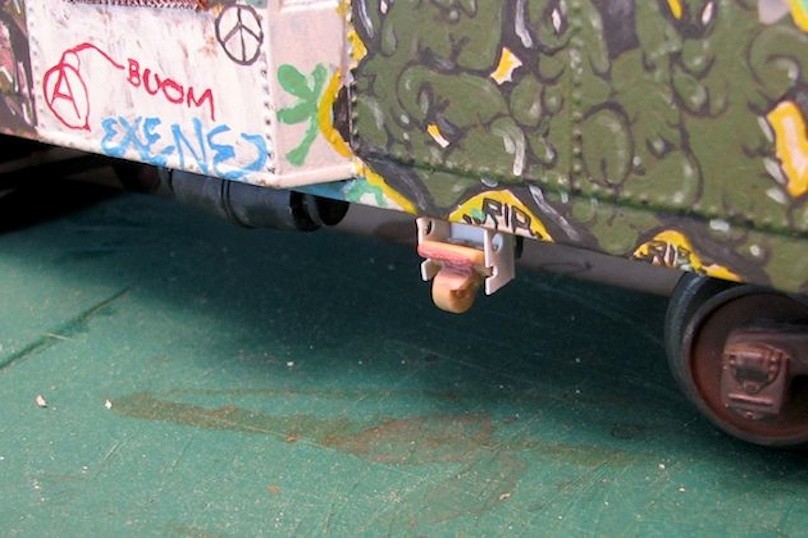
This model was shipped across the country to run on an operational layout during a live contest/show. It was handled quite a bit so I waited until it was returned to add certain details.
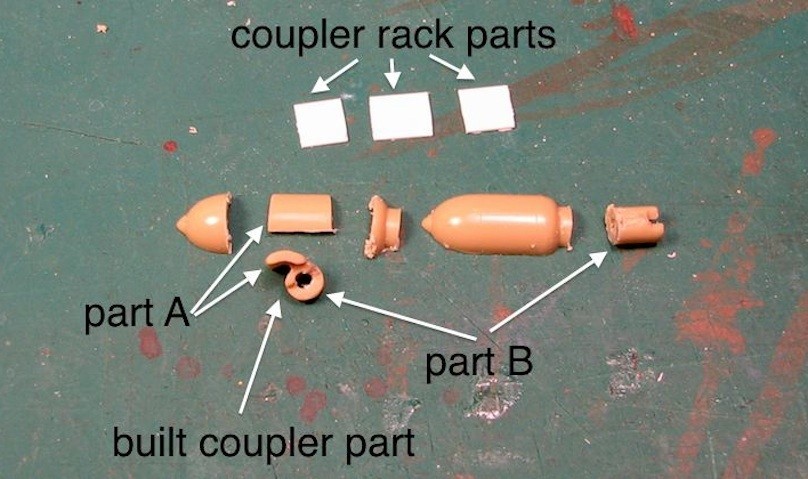
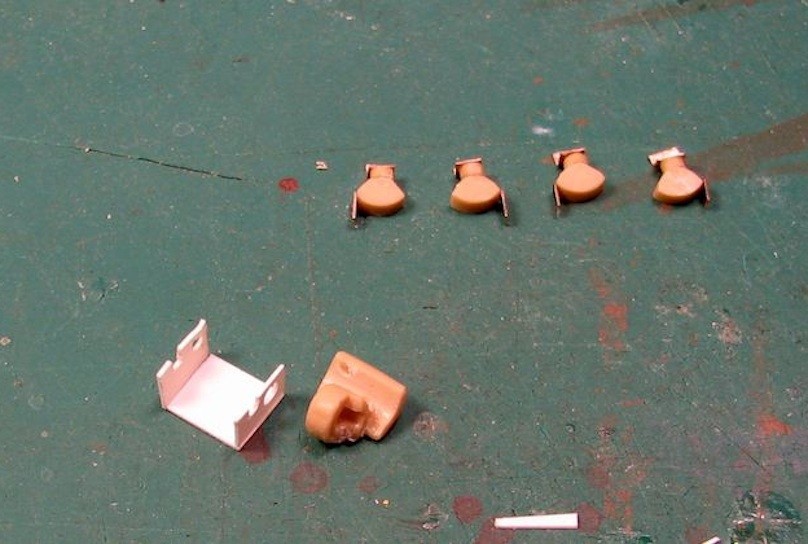
These would include the stairway lights and the spare coupler in its storage rack.
The Revell Kfz 251/1 Rocket Launcher in 1/35 scale provided the parts used to make these details that I found in my spare parts box.


The pulley belts were made from electrical tape that I cut very thin.
.